You can have a great camera, a professional background, and a sharp slide deck. None of it matters if people on the other end of the call have to ask you to repeat yourself every three minutes. Poor audio is the single fastest way to lose credibility on a remote video call, and it is also one of the easiest problems to fix once you know what actually causes it.
I have been working from home full time since 2019. In that time I have sat in on hundreds of calls, tested a stack of different audio setups, and coached a few people who had no idea their microphone was making them sound like they were calling from inside a tin can. The pattern I kept seeing: most home office audio problems are not about the device at all. They are about placement, room treatment, and settings. This guide walks through all five steps I actually use, with the Anker PowerConf S330 as the reference hardware since it is the speakerphone I keep going back to.
Your audio is costing you credibility on every call. Start here.
The Anker PowerConf S330 has six microphones that pick up voice cleanly up to 360 degrees, noise cancellation that actually works, and USB-C plug-and-play setup that takes less than a minute. Rated 4.4 stars from over 1,800 remote workers.
Amazon Check Today's Price on Amazon →Step 1: Choose the Right Speakerphone for a Home Office (Not a Conference Room)
Most people buying a speakerphone for a video call make the same mistake: they look at products designed for a twelve-person conference room and wonder why the audio sounds hollow in a ten-by-twelve home office. Conference room units push audio outward to fill a large space. That design works against you in a smaller room because the directional pickup pattern is calibrated for distance, not intimacy.
What you want for a home office is a compact unit with a tight 360-degree pickup pattern, built-in noise cancellation tuned to human speech frequencies, and a microphone array that handles one to two voices at close range without sounding distant. The Anker PowerConf S330 fits this profile: six microphones arranged in a ring optimized for a personal workspace, not a boardroom. It connects via USB-C and works immediately on Windows and Mac without installing drivers. That matters more than you might think, because any setup friction is setup you will eventually skip.
If you are still wearing a headset every day, worth reading: 10 Reasons a Conference Speakerphone Beats Wearing a Headset All Day. The short version is ear fatigue and neck tension add up across a full week of calls in ways that are easy to ignore until they stop being ignorable.
Step 2: Place the Speakerphone at the Right Distance and Angle
This is where most setups fail even when the hardware is solid. Distance and angle between you and the microphone determine more about perceived audio quality than the device specification sheet. Too close and the mic picks up every breath and desk noise. Too far and the room starts to dominate over your voice.
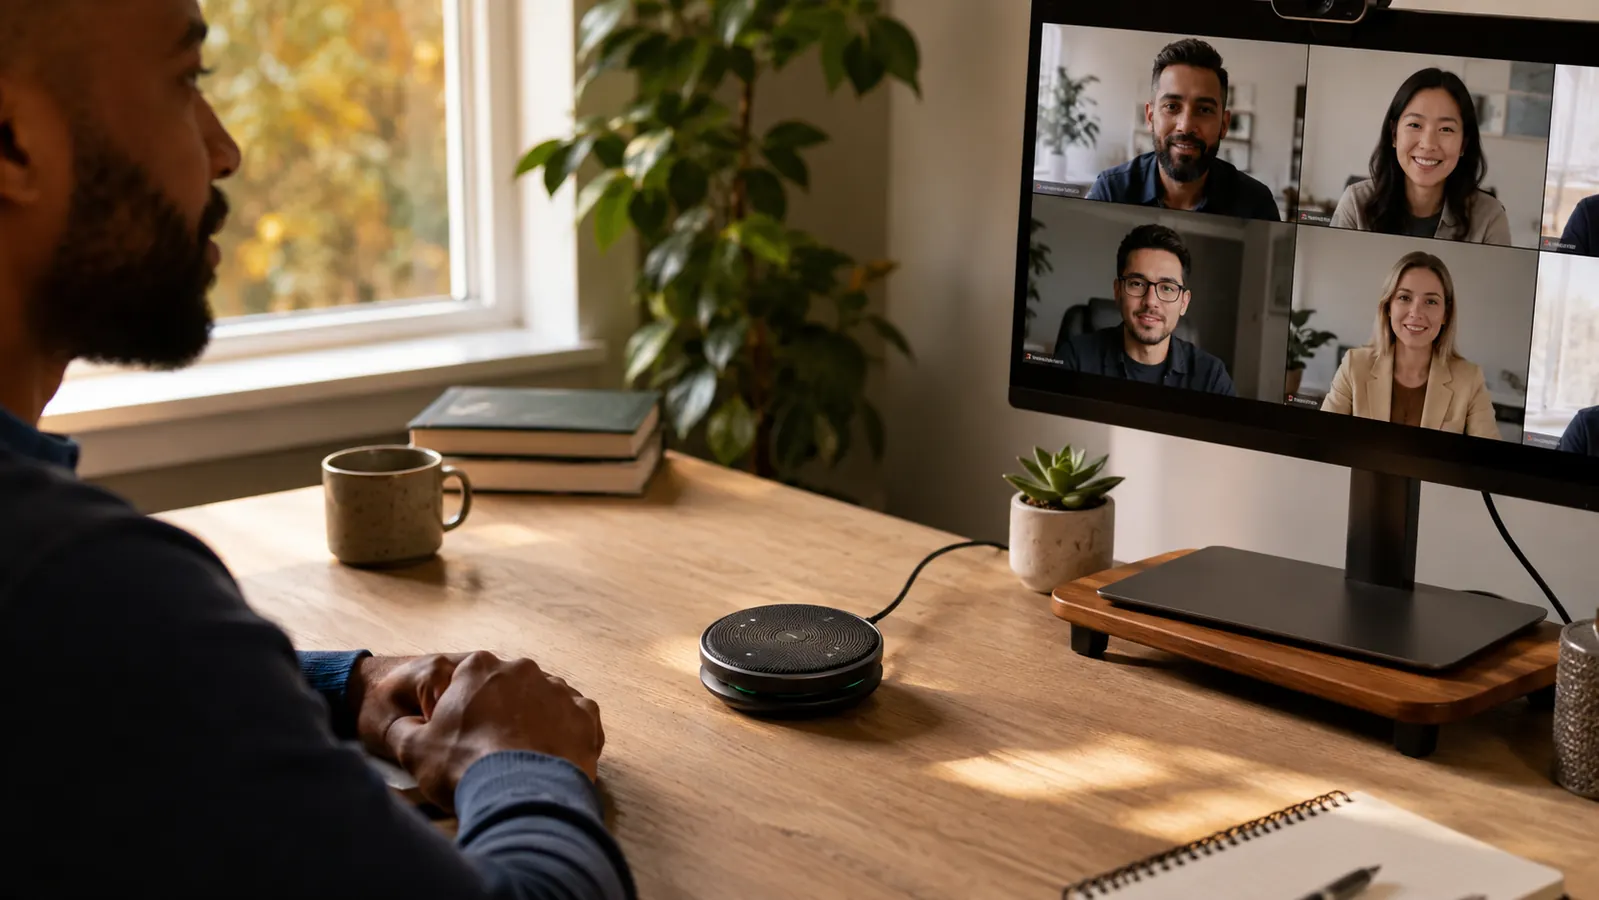
The target range for a unit like the Anker PowerConf S330 is 18 to 24 inches from your mouth. If you are sitting in a standard desk chair at a standard depth desk, this typically puts the speakerphone near the base of your monitor or between your keyboard and the screen. Do not put it behind the laptop or monitor. Placing it in front of the screen, between you and the camera, is the correct position. It also keeps the pickup pattern aimed at your voice rather than at whatever is behind you.
Avoid placing the speakerphone directly on a hollow wooden desk surface without any dampening underneath. Hard surfaces cause a thin ringing resonance that shows up in recordings even when you cannot hear it live. A thin rubber pad or even a folded cloth under the unit reduces this noticeably. The PowerConf S330 has a silicone base that helps, but adding a rubber mat cuts the remaining vibration further on hollow desks.
Step 3: Treat the Room Before You Buy More Gear
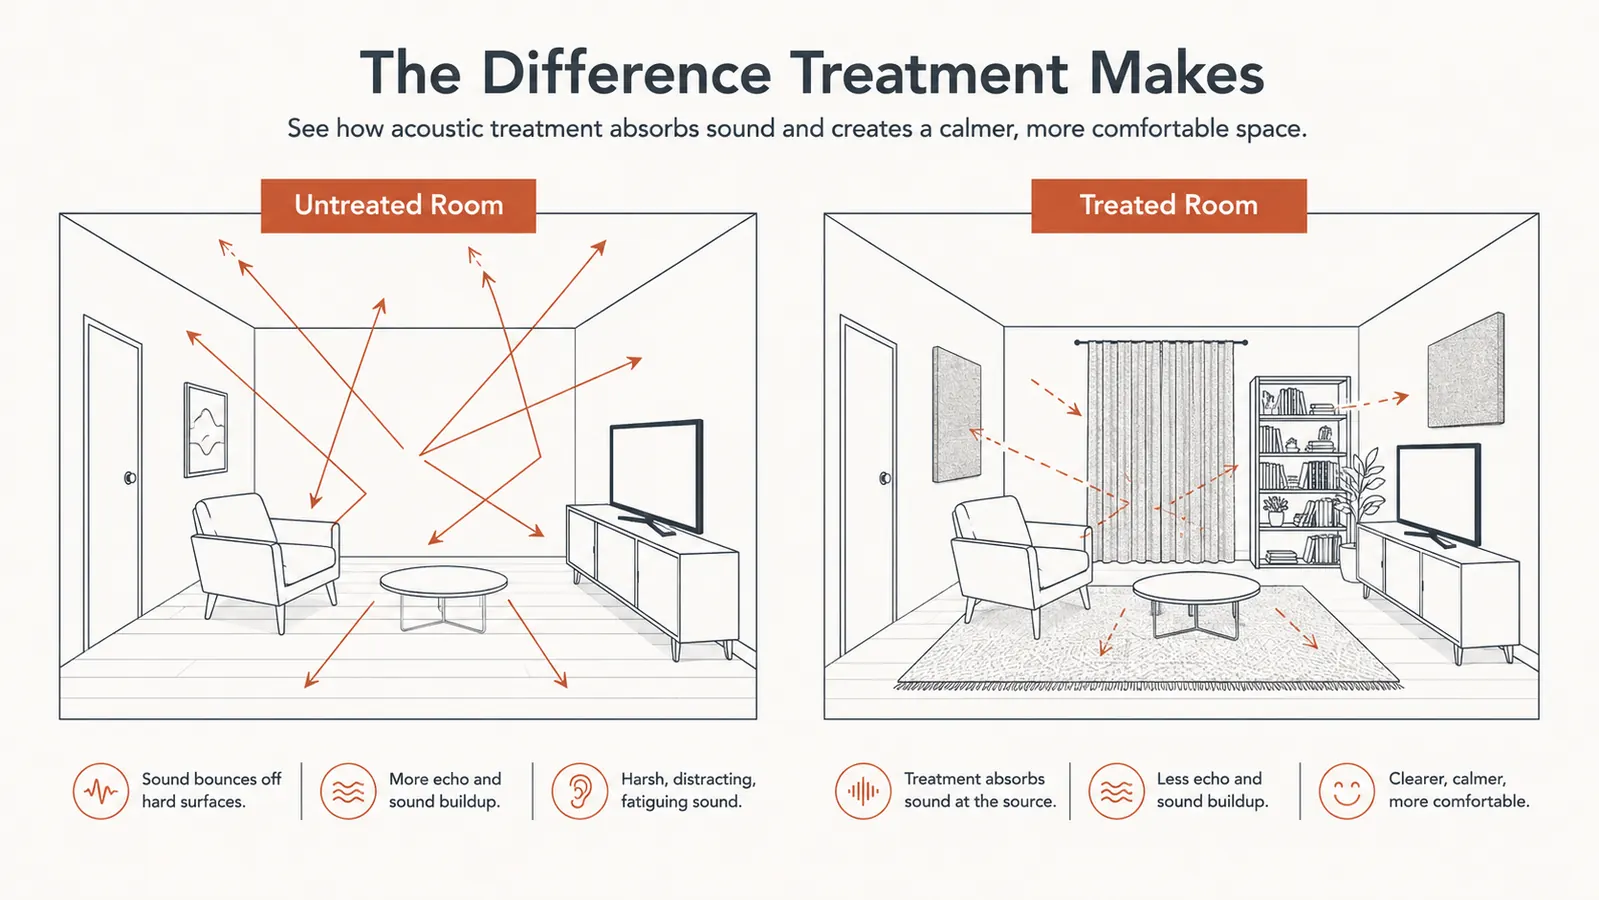
Before you spend another dollar on audio hardware, take two minutes and clap your hands once in the room you use for calls. If you hear a flutter or a ring that hangs in the air for more than a quarter second, your room is working against you. Hard floors, bare walls, and glass surfaces reflect sound back into the microphone in a way that makes your voice sound hollow and distant, even when you are sitting right in front of a quality mic.
You do not need acoustic foam panels. What you need is to add soft surfaces. A rug on the floor behind your chair, curtains instead of bare blinds, a bookcase filled with books, a couch or upholstered chair in the line of sight behind you: all of these break up sound reflections without turning your home office into a recording studio. Most remote workers already have one or two of these in the room without realizing they are doing acoustic treatment.
The clearest quick fix I have found: close the closet door if one is in the room, and point yourself toward a wall with a bookshelf rather than a bare wall or window. That one positioning change drops the reverb tail on most home office recordings by roughly half.
The clap test takes two minutes. If you hear a ring or flutter, your room is making your microphone sound worse than it is, and no speakerphone upgrade fixes a reflective room.

Step 4: Configure Your Platform Audio Settings Correctly
Plugging in a speakerphone does not automatically make it your active audio device. Every video platform handles input and output selection separately, and the defaults often pull from the operating system's last-set device, not what you just plugged in. The first time you connect the Anker PowerConf S330, go into your call platform's audio settings before your next call and manually select it as both the microphone and the speaker.
On Zoom: Settings > Audio > select the S330 under Microphone and Speaker. Check the box for 'Automatically adjust microphone volume' only if your call environments change significantly. If you are always at your desk, turn it off and set the level manually. Automatic volume adjustment adds latency and sometimes causes pumping on quiet moments.
On Microsoft Teams: click the three dots menu during a call, go to Device Settings, and select the speakerphone for both microphone and speaker. Teams has a habit of reverting to the built-in laptop mic when you unplug and replug USB devices, so build the habit of checking device settings at the start of every call. It takes about five seconds and prevents the most common professional audio failure: you think you are on the speakerphone and you are actually broadcasting through your laptop's built-in microphone from inside a closed laptop lid.
Also: disable noise cancellation in the platform if the speakerphone has its own built-in noise cancellation. Running two layers of noise suppression simultaneously over-processes the audio and strips out the warmth and naturalness from your voice. The PowerConf S330 handles noise cancellation in hardware. Turn Zoom's or Teams' software noise suppression to 'Off' or 'Low' when using it.
Step 5: Test Your Setup the Way Your Audience Actually Hears It
Most people test their microphone by listening to themselves through the platform's monitoring preview. This is not how your audience hears you. Monitoring previews use your local audio buffer, which means you are hearing yourself with zero network processing, zero codec compression, and zero of the artifacts that the other person actually experiences. You need to hear yourself the way they do.
The simplest approach: record a thirty-second clip using your platform's local recording feature (Zoom: Record to This Computer; Teams: Start Recording). Then play it back through headphones or an external speaker. Listen for three specific things: reverb tail at the end of sentences, any mechanical hum from HVAC or fan noise, and whether your voice sounds as close and present as a podcast host or as distant and thin as a conference call from 2009.
If you hear reverb, go back to Step 3 and add more soft surfaces. If you hear HVAC hum, move the speakerphone slightly off-axis from the air vent or use a phone to play a brown noise track in the room to help the noise cancellation lock onto a consistent background instead of intermittent fan pulses. If your voice sounds thin and distant, move the speakerphone two to four inches closer and re-record.
One more thing worth doing: have someone else call you specifically to test the audio. Ask them to describe what they hear in plain language, not just 'sounds fine.' Most people will say it sounds fine even when it does not, because they have calibrated expectations down over years of bad conference calls. Instead, ask them: 'Does my voice sound like I am in the room with you, or does it sound like I am calling from far away?' That specific question cuts through the politeness and gets you a real answer.
What Else Helps
A few things that do not fit neatly into steps but make a real difference in practice. First, wear the same clothes on calls that you would wear to a client office. This sounds like soft advice, but the physical cue changes how you sit and how you speak, and microphones are honest about both. Slouched posture in soft clothing produces a softer, less projected voice. It shows up in the recording.
Second, if you are on three or more calls a day, a dedicated-use speakerphone that you do not unplug between calls is worth it. Every unplug-and-replug cycle is another opportunity for the device to come back as the wrong audio source. The PowerConf S330's USB-C cable is short enough to stay tidy when it lives permanently on your desk without becoming a cable management problem.
Third, lighting and audio are not independent. When you look good on camera, the people on the call trust what they hear more. It is an irrational bias and it is also completely real. Getting a small ring light or repositioning a window so it is in front of you rather than behind you is audio-adjacent advice in a roundabout way. Fix both together, not just the audio alone. For a deeper look at how the Anker PowerConf S330 performs across a full day of calls, see the six-month review.
Good audio is the professional edge most remote workers are sleeping on.
The Anker PowerConf S330 takes one minute to set up, works with every major video platform, and eliminates the most common home office audio problems without requiring any acoustic treatment or software tuning. Over 1,800 remote workers rate it 4.4 stars.
Amazon Check Today's Price on Amazon →